
SafetyTac® Installation Instructions
Installing SafetyTac® floor marking tape can be completed in six easy steps. Watch SafetyTac® Installation Video
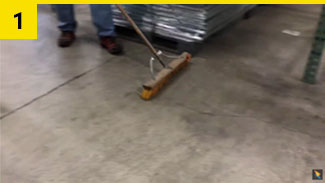
- Clean.
Start off by sweeping the floor, ridding the surface of dirt and debris. Clean the floor with a mild detergent to remove any surface oils or films. - Mark.
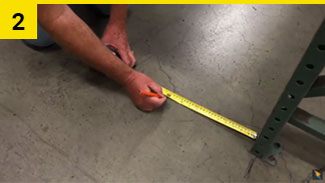
Once the area has been cleaned, measure and mark your floor to help ensure straight lines. - Anchor.
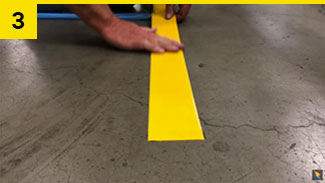
Remove a small portion of the backing from the tape, then press down on the surface to anchor SafetyTac® to your floor. - Unroll.
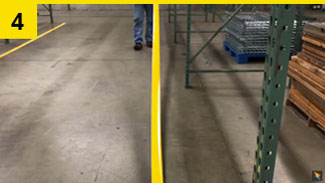
Once you've anchored your tape, unroll tap to the desired length. Lay tape in a straight line by following your markings. - Press.
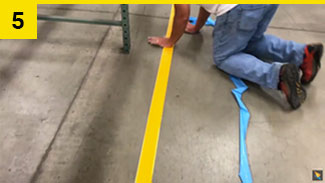
Next, go down your SafetyTac® line, gently removing the backing and pressing down to bond tape to the floor. - Secure.
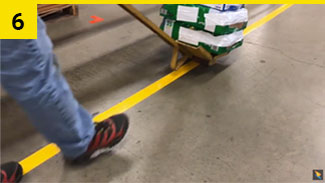
Tamp down your floor marking tape with 250lbs+ of weight to ensure the tape is fixed to the floor securely. This can be done using a cart, or dolly, or by driving a forklift down the length of the tape.
That's it! SafetyTac® should now be installed and ready to perform. Although immediately bonded, we recommend allowing 24 hours to fully cure before exposure to water, chemicals, or heavy equipment traffic.

Returns/Exchanges
Return or exchanging an item(s)?
- Call us at 1-888-246-6770 or email us to intiate return and get an RMA number.
- Download the RMA Authorization form and follow the instructions.